Phoenix Waveform “Hunting Protocol”
How to Identify Dysfunctional Neurological Pathways & Source of Pain
The Hunting Protocol is the core method used with the Phoenix Waveform to locate neurological dysfunction—areas where the nervous system is guarding, shutting down, or sending altered pain signals.
Instead of guessing where pain is coming from, the Hunting Protocol helps you map the true source and guide your treatment or training session with accuracy.
What the Hunting Protocol Does
The protocol identifies:
-
Overactive pain receptors
-
Inhibited or shut-down muscle groups
-
Compensation patterns
-
Protective reflexes
-
Faulty movement pathways
-
Neuromuscular disconnection
By finding and stimulating these areas, the Phoenix helps re-establish proper communication between the brain, nerves, and muscles.
______________________________________
Why Hunting Works
Traditional therapy treats the symptom (the muscle or joint).
The Hunting Protocol finds the root cause inside the nervous system.
This process helps:
-
Reduce pain quickly
-
Improve movement
-
Restore strength
-
Increase muscle activation
-
Shorten recovery time
-
Improve long-term function
How to HUNT with the Phoenix Waveform
Elbow Movement Progression after HUNT
Program: Phoenix HUNT Setting (500 Contraction per second)
On occasions, it may be necessary to “hunt” for the correct pad placement and possibly other sources or origins of the pain, such as trigger points and hypersensitive areas (possible inflammation and/or tissue damage). This involves moving the electrode pads around on the body until you feel or the client feels an increase in stimulation over an active trigger point. When moving the pads over the body make sure you drag them across the skin keeping them in contact with the skin. If you lift the pad off the skin and then put the pad back on the skin you may feel an increase in muscle stimulation and some discomfort.
To do use the Phoenix Setting. Attach the carbon Black lead to the NEG (Black) lead wire and the Red carbon lead to the POS lead wire. If you are “hunting” in the upper body place, wet the sponge and place the sponge between the RED Electrode and and the body and wrap it around the upper arm of the opposite side you are hunting. If you are “hunting” in the lower body place the RED electrode on the outside of the opposite hip.
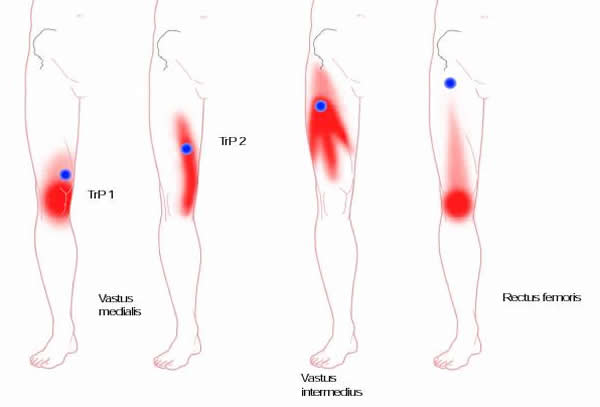
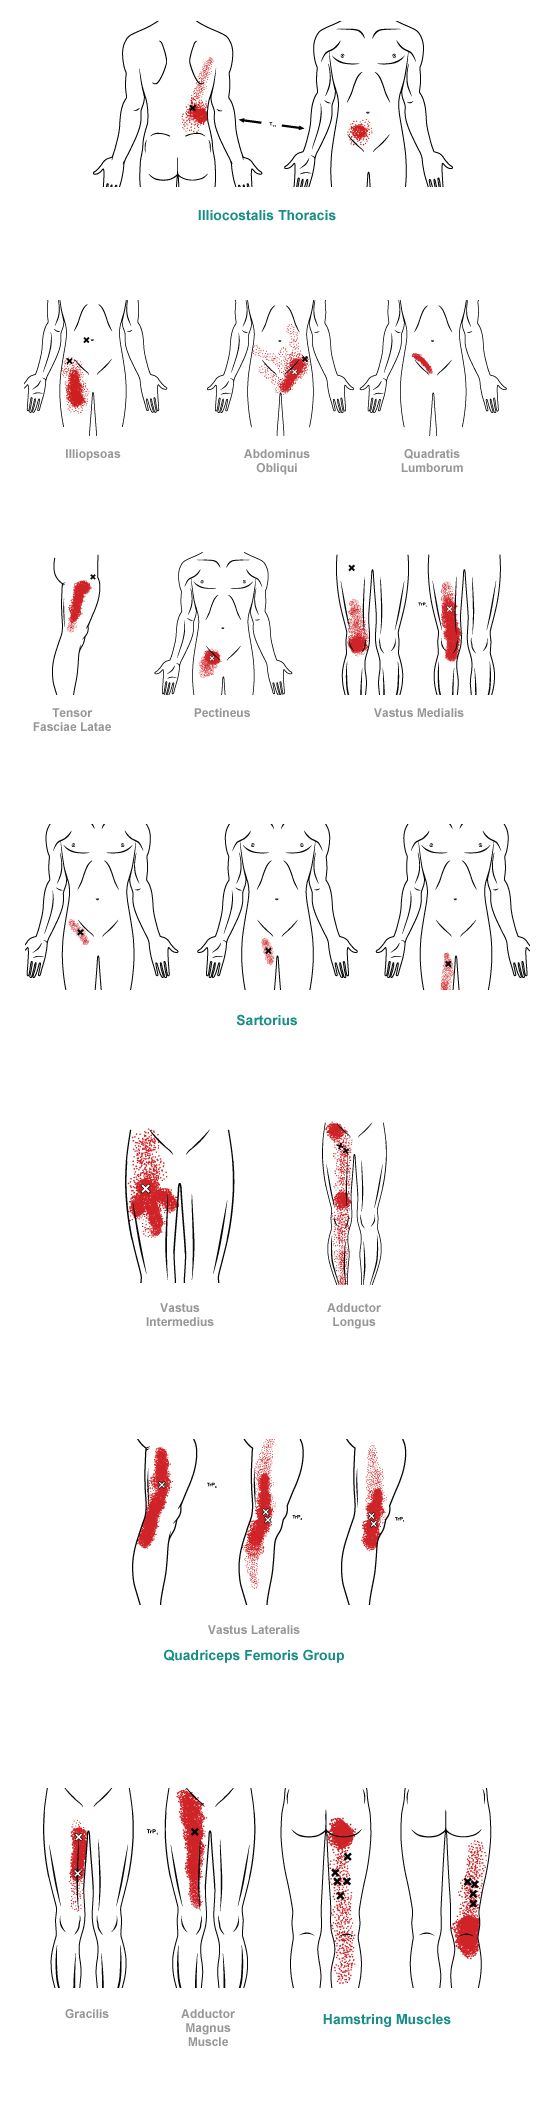
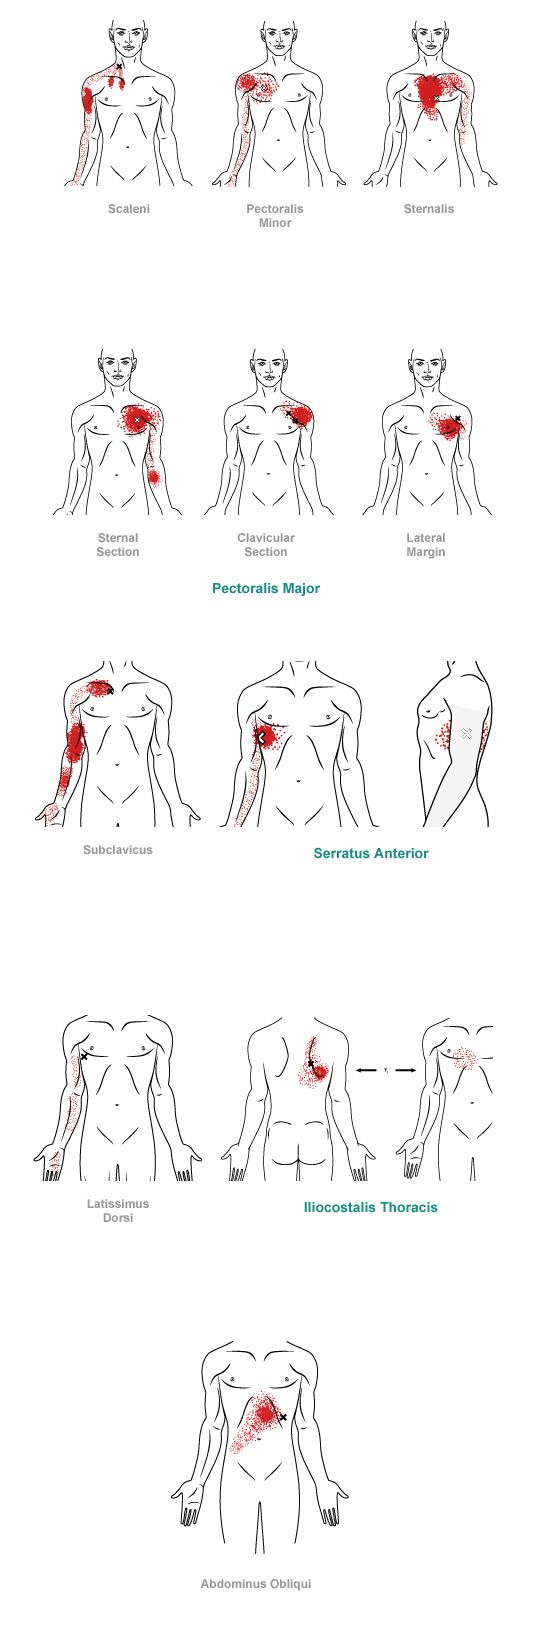
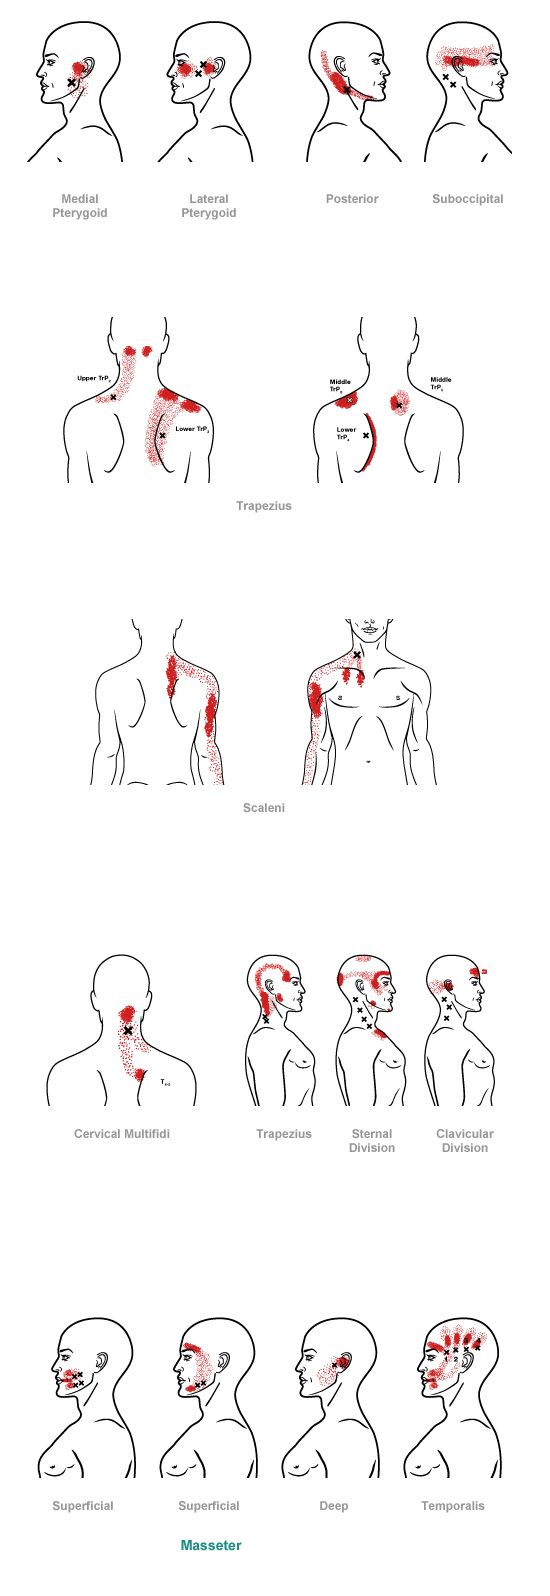
We are hunting for trigger points. When you go over a trigger point you may feel a sensation referring down the associated referral pattern for that specific trigger point. See the trigger point chart for ideas on where to hunt for these trigger points and their referral patterns
Now place the BLACK electrode and sponge over the area of pain. You will be using channel #1. Turn the channel up until you feel an intensity or discomfort as a 5 out of 10. You will now move the Black electrode and pad over the entire area noting an increase in intensity or discomfort level. Find the 4 most intense or discomfort areas.
Now remove the carbon pads and attach the self-stick pads. Place these 4 pads over the 4 most intense spots you just located. These will be attached to Channel 1 and Channel 3. Now turn up the intensity to a level of discomfort of 5 out of 10. Slowly, move the body part through its full range of motion until you feel a motion where the intensity or discomfort increases. Once you find this repeat that motion for 5 to 10 reps. If you feel that the intensity or discomfort reduce, increase the intensity of the Phoenix. Repeat this for 10 min. After 10 min reverses the direction of the electrons.
Changing the polarity of the electrodes and reversing the flow of electrons:
Turn the Phoenix intensity to ZERO, then unplug the POS lead wire from the self-stick electrode and plug it into the self stick pad that the NEG was attached to. Then take the NEG lead wire and attach it to the pad where the POS lead wire was attached to.
Now turn up the intensity to a level of discomfort of 5 out of 10. Slowly, move the body part through its full range of motion until you feel a motion where the intensity or discomfort increases. Once you find this, take the muscle through its eccentric motion. That is you want to length the muscle while it is contracting.
There is a ton of research on the benefits of lengthening the muscle while it is contracting. Here we are using the Phoenix to contact the muscle and then we are having the patient actively lengthen the muscle.
Repeat that motion for 5 to 10 reps. If you feel that the intensity or discomfort reduce, increase the intensity of the Phoenix. Repeat for 10 min.
Common trigger points and referral patterns.
Use the below charts below as references for the referral patterns and the corresponding location of the trigger points.


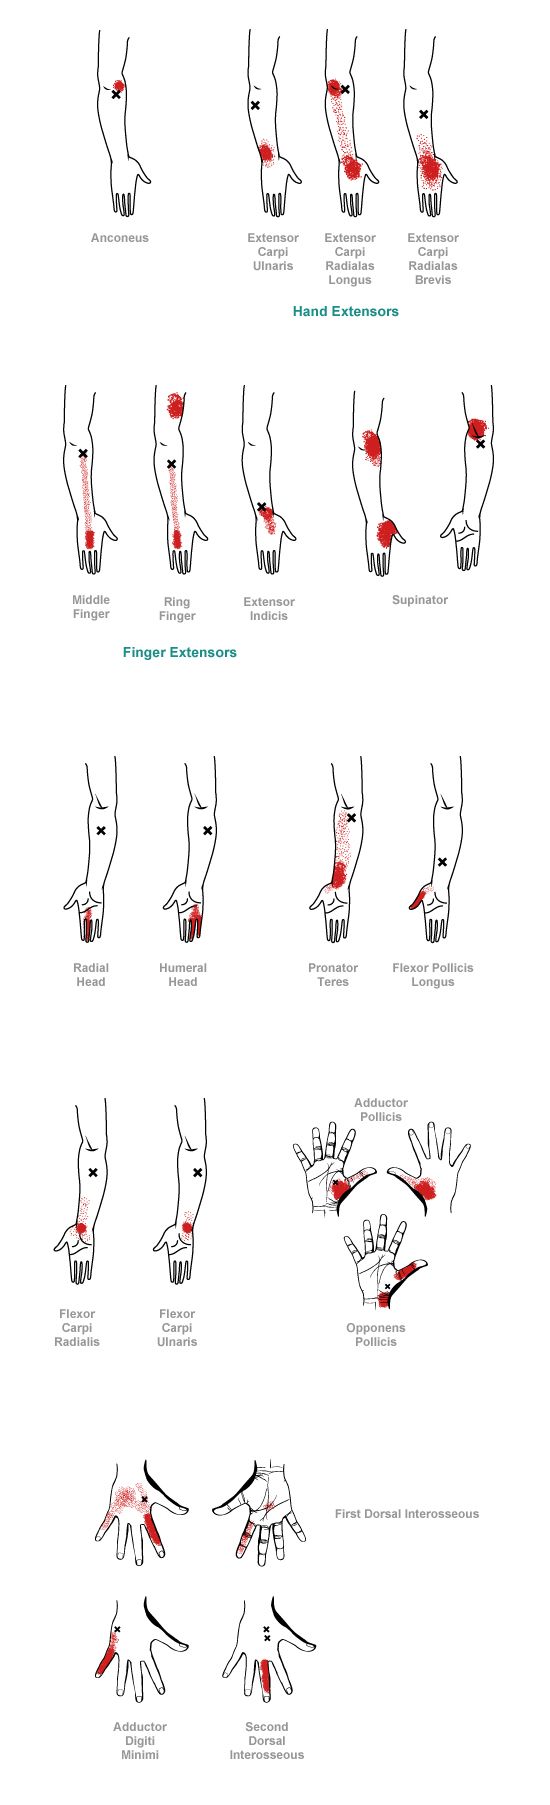

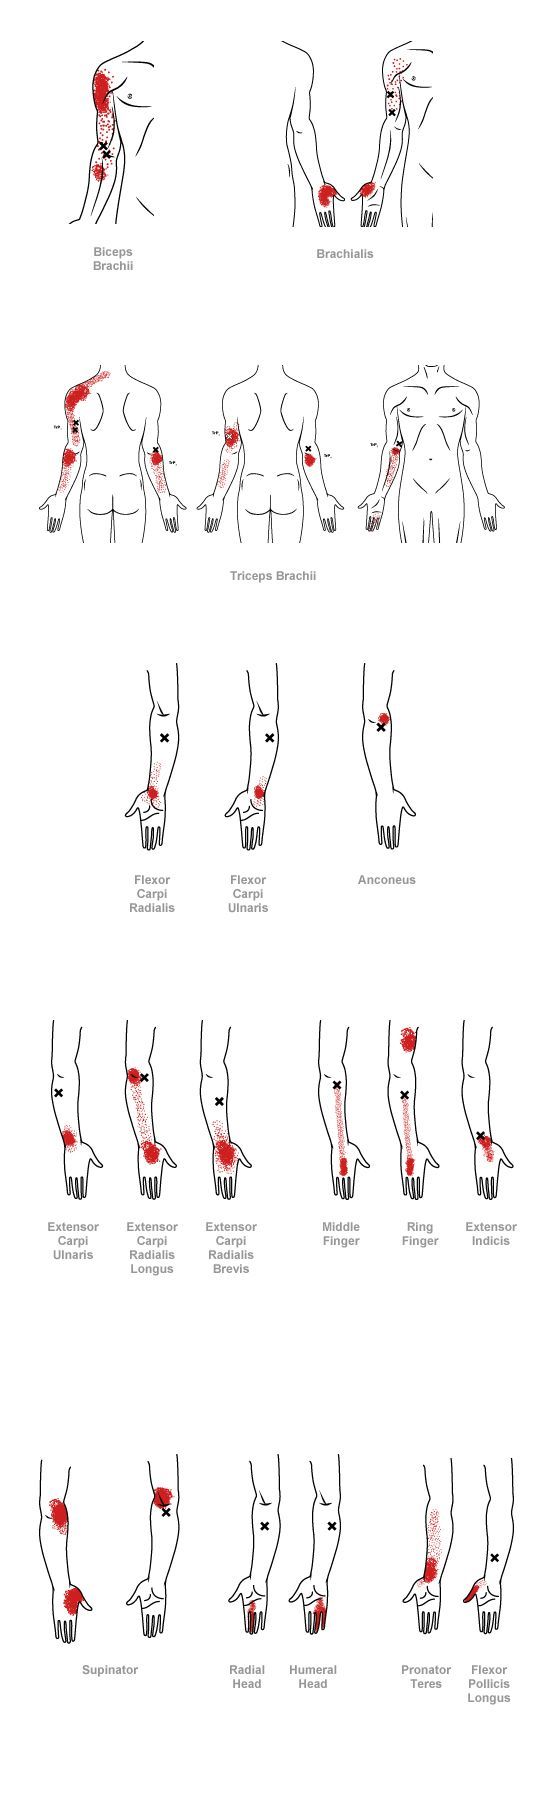
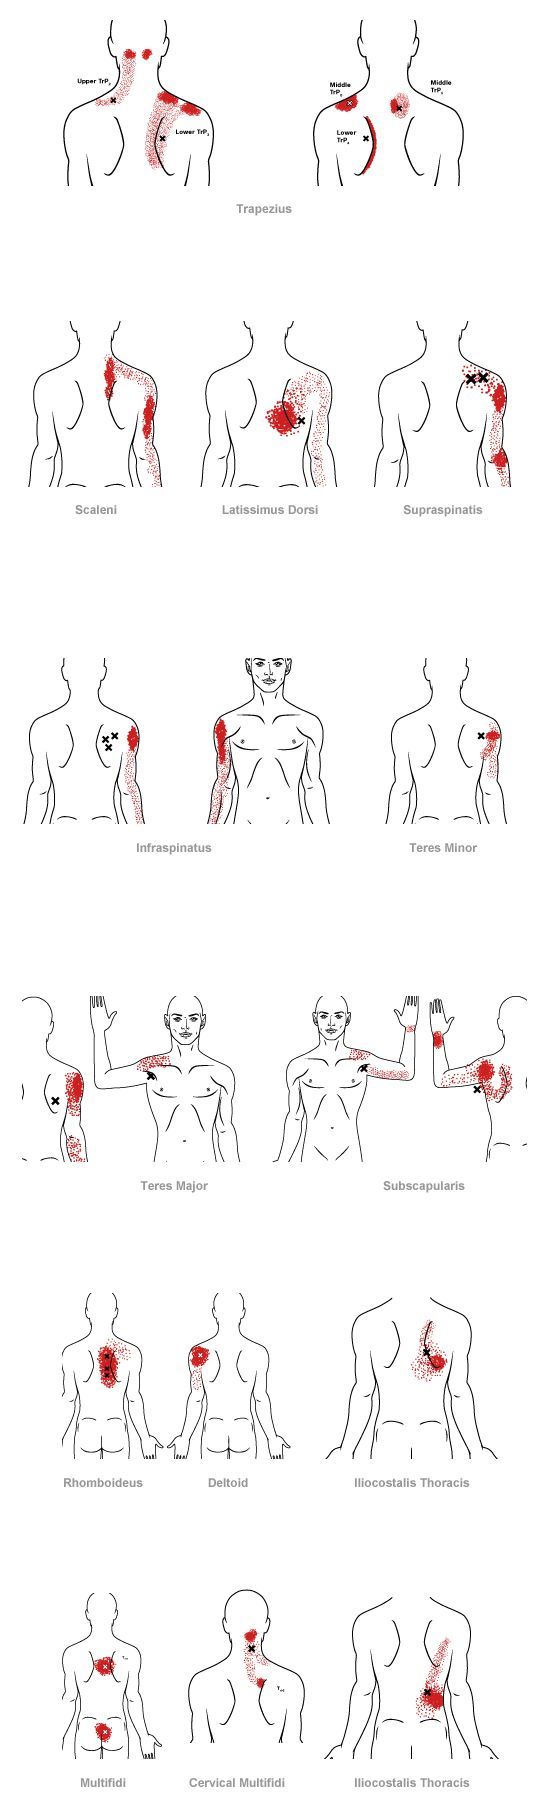

Results may vary.
Consult your physician or health care provider and follow all safety instructions before beginning any new exercise program, especially if you are pregnant, or have any medical condition. The contents on our website are for informational purposes only and do not constitute medical, legal, or any other type of professional advice. Read the Globus and Phoenix Training Manual Fully before using the EMS unit. Results will vary depending on the individual, personal health status, performance goals, and proper use of the device. Terms of Service, Disclaimer, & Privacy Policy
Copyright 2022 Dr. Jeff Banas